Homelab – Build a High-Availability Kubernetes Cluster with Rancher on Proxmox – Part 3
Here it is, folks! The moment you’ve all been waiting for! Time to start building out this lab.
As with any good project, we need to start with a good foundation, and that means a solid network setup. If you recall the initial diagram,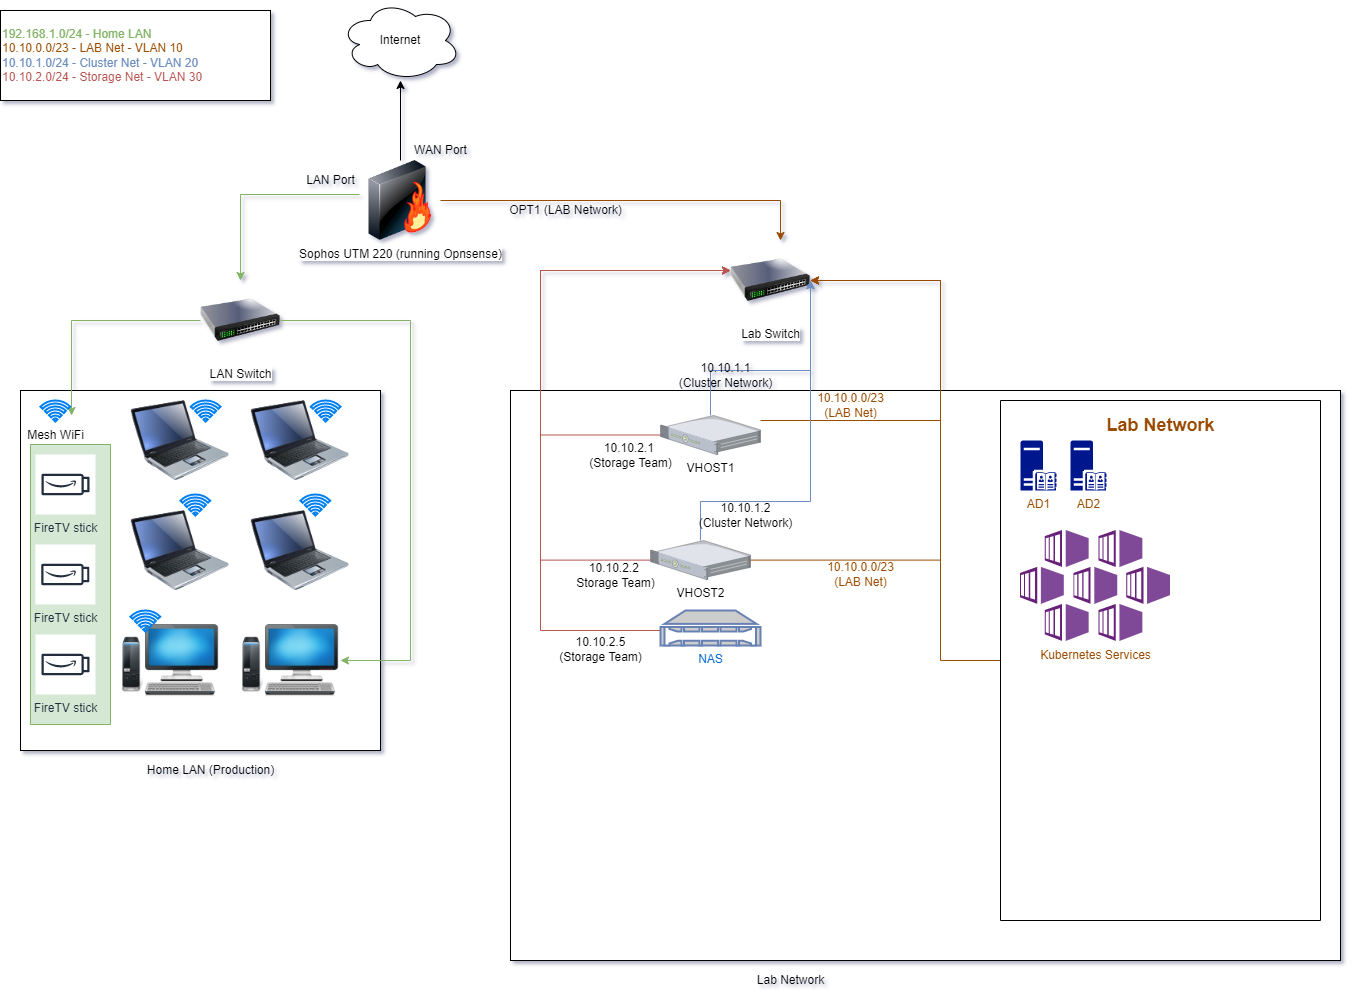 you’ll recall that we have 4 total networks: the production network(that must always work, the main lab network where our services live, the cluster network to allow communication between Proxmox hosts, and the storage network to hold all of our VMs and containers and offer high-speed data transfer.
Routing and Internet Connection
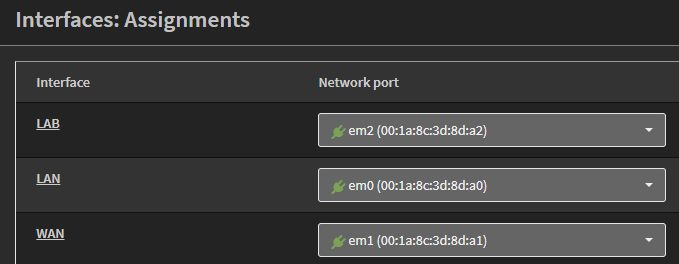
We need to start with building out our Opnsense router. There are many tutorials on the Internet for how to install and configure Opnsense, and we’ll use a very simple process here (see my upcoming series on Confguring Opnsense for an enterprise homelab for details). Since I’m on a residential cable broadband plan, my WAN link is set to DHCP to get a public IP address from my ISP. The LAN port is configured to server the 192.168.1.0/24 range for my production network, and I have an Opt1 port that I’ve renamed to “Lab” for my main lab network. In the Interfaces: Assignments screen of Opnsense, it looks like this:
Even though I mention VLANs in my diagram, I don’t have them configured on my router. The reason for this is because I’m using two physical switches to separate the lab from my production network, so that I can make any changes I want to the lab configuration without disrupting anyone else’s work, school, or relaxation time. If you only have a single switch for your network, you can configure the VLANs in Opnsense to achieve the same effect.
Switching (or, how to link it all together)
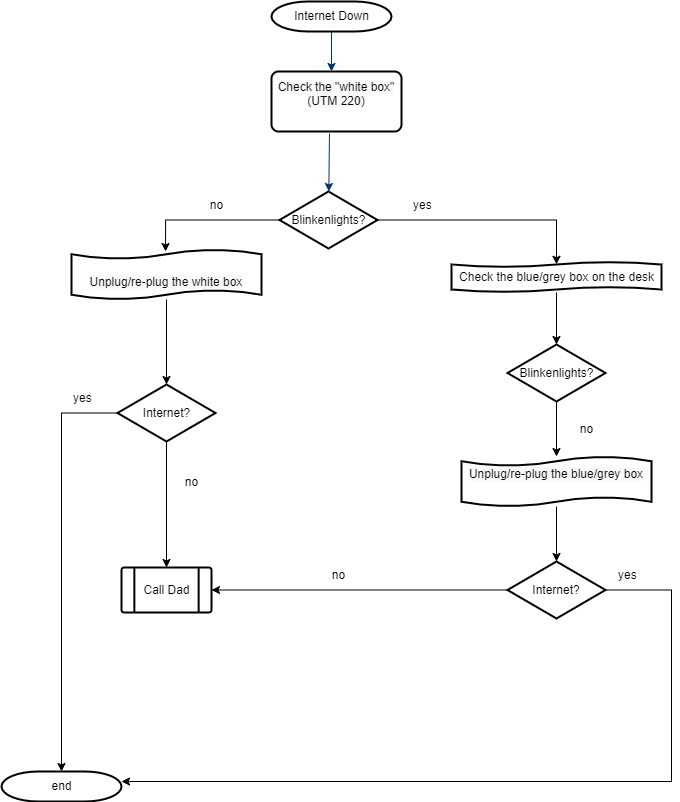
In Part 1, I showed the network diagram that build this network, and in Part 2, I defined the hardware that makes it all possible. Our production network is served by the TP-Link switch mentioned in each of those posts. While this is a managed switch, I’m not using any of the higher-level Layer 2 functions like VLANs; only the single, default VLAN1. I wanted to keep this as simple as possible so other members of the family can troubleshoot if needed. It’s a very simple runbook:
The lab is a bit more complicated; the D-Link managed switch contains 3 VLANs – the lab network (10.10.0.0./23), the cluster network (10.10.2.0/24), and the storage network (10.10.3.0/24).
VLAN 10 (the main lab VLAN) uses the majority of my switch to allow for additional physical devices, if I decide to add them, and contains most of the ports on the switch:

VLAN 20 is the cluster network, to manage the communication between the Proxmox servers in the cluster. This network only has 2 machines and doesn’t get a lot of traffic, so we don’t use may ports for it on the switch:

Finally, VLAN 30 is the storage VLAN. This VLAN contains the teamed network adapters from both of the Proxmox servers, as well as the teamed adapters from the XigmaNAS storage server. All of these ports, as well as the NICs and teams, are configured with jumbo frames to allow maximum throughput:

Attractive element of content. I simply stumbled upon your web site and in accession capital to assert that I get in fact loved account your blog posts. Any way I will be subscribing to your feeds or even I success you access consistently quickly.